
DVD’s are out of the game now. Today flash storages are ruling the world. SSDs USB and M.2 these are the kind of storage that is broadly being used today, and the growth of these are unimaginable in our modern world. The Operating Systems, without an operating system the computer is just a piece of machine. There are more operating systems available; the top 3 are Windows, Mac OS, and Ubuntu. To install these on our computer, we were using DVD in past couple of years and Damm it is too slow. Here, the flash storage takes the lead because they can transfer files faster than DVDs and Mechanical Hardrive. Now we are using USB to install operating systems. We can also carry the operating systems on our Pendrive and use it on every computer. To install OS, we had to make Bootable USB that is why this article is here.
Installing Windows and Ubuntu is easy. The benefit of using USB for installing an operating system is that it is faster and error free. There are various types of USB is available such as USB 2.0, USB 3.0, USB 3.1 and USB-C. USB 2.0 is very slower device whereas USB 3.0 and above is very faster so here I recommend you to use USB 3.0 and above to install the Operating System. To install an OS, we need to create a bootable pen drive else it will not detect on the computer BIOS. So here we walk through the steps to make bootable USB on both Mac and Windows operating systems.
What We Need To Create Bootable USB
- A computer that has Windows or Ubuntu or Mac installed in it.
- 8GB or above Pendrive
- Operating System Files(That can download from their official websites)
- Two applications(Rufus and UNetbootin)
Precautions
- Backup all your files from the pen drive.
- Make sure that The OS files are verified (Damage, file missing, Unknown format)
- Download Rufus and UNetbootin only from the given links or from their official sites.
On Windows OS
To make bootable USB drive we need an application called Rufus. It can create bootable USB for both BIOS and UEFI systems also it can create bootable USB of several operating systems such as Windows, Ubuntu, Linux, etc. Creating bootable USB using Rufus is a natural process because it is a portable application so that we don’t have to install it on our computer. UNetbootin is also supporting in Windows, but I found that Rufus is far better than UNetbootin on Windows but in Mac, UNetbootin shows off. Let’s begin.
- Download Rufus and ISO file on your computer.
- Connect USB Drive on the computer.(Make sure to copy all the files from your pen drive else Rufus will delete the files.)
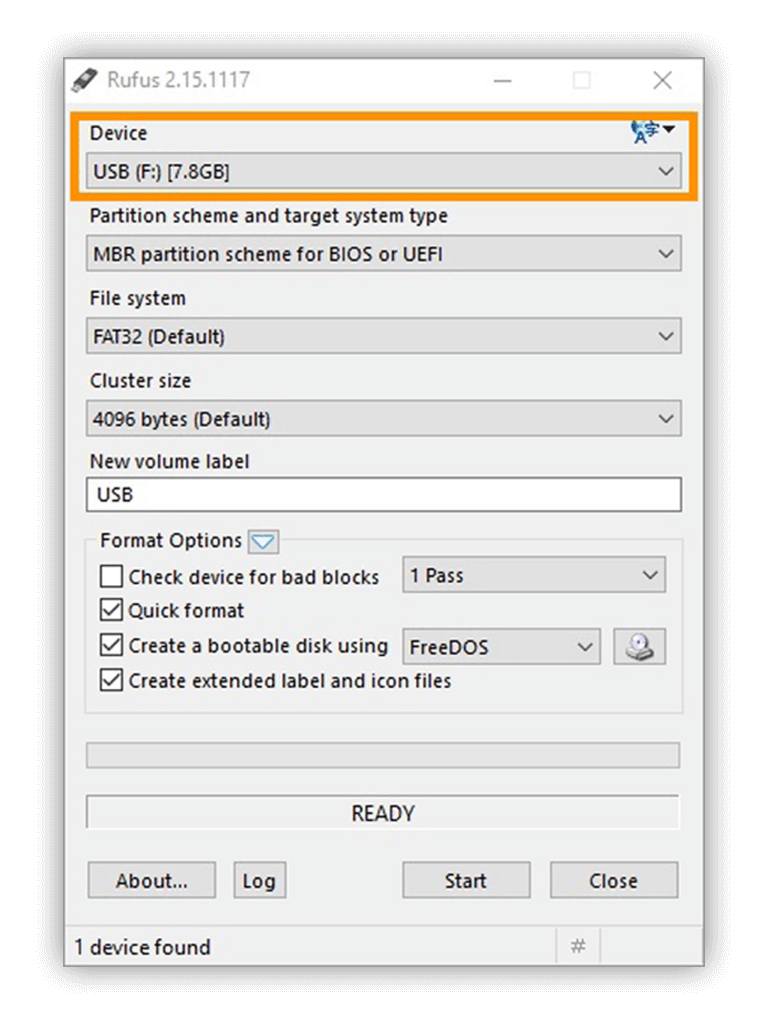
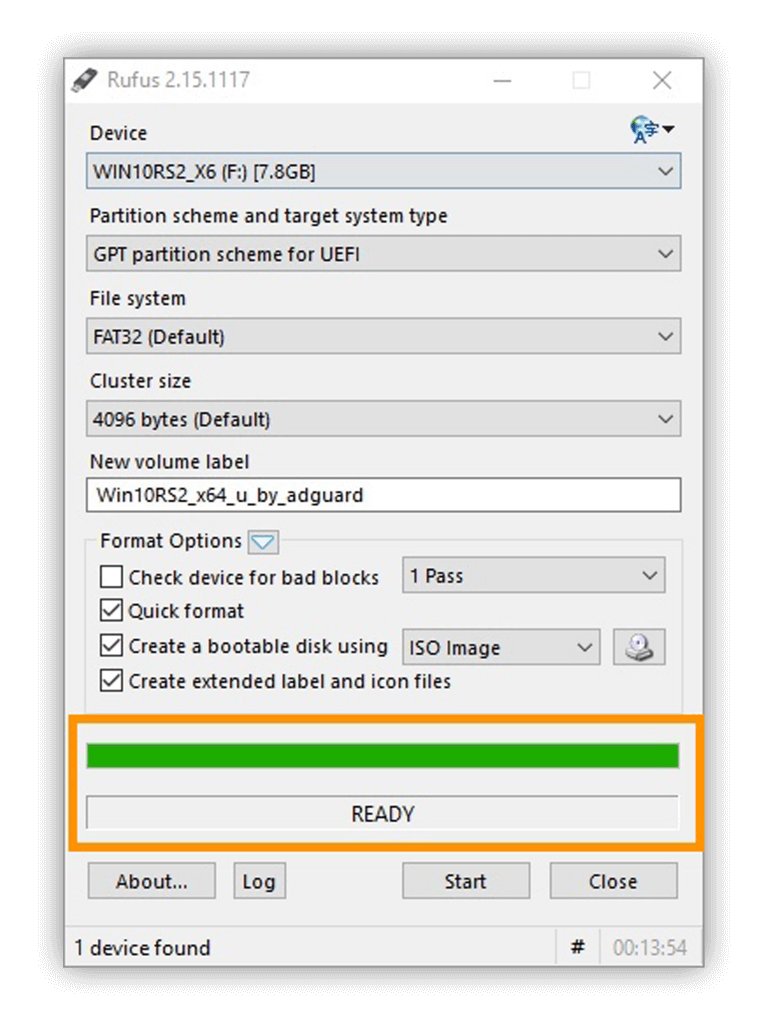
- Open Rufus. Here you can see your pen drive that is selected
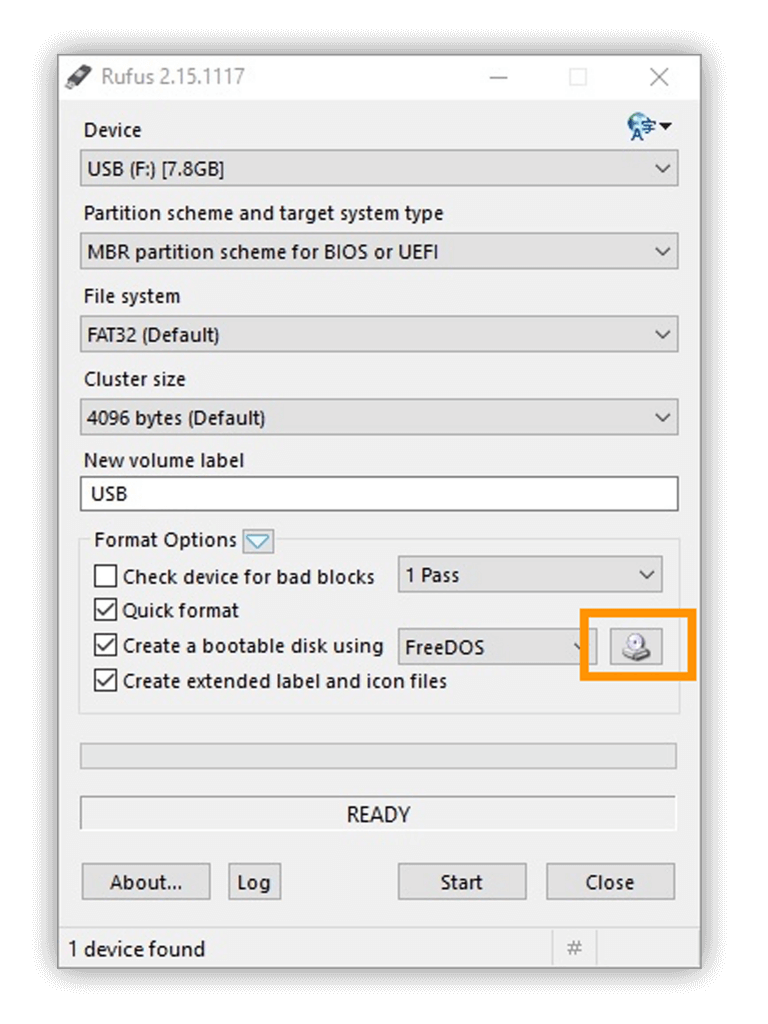
- Select Your ISO file from the app. Click on the little Disk icon to select your ISO.
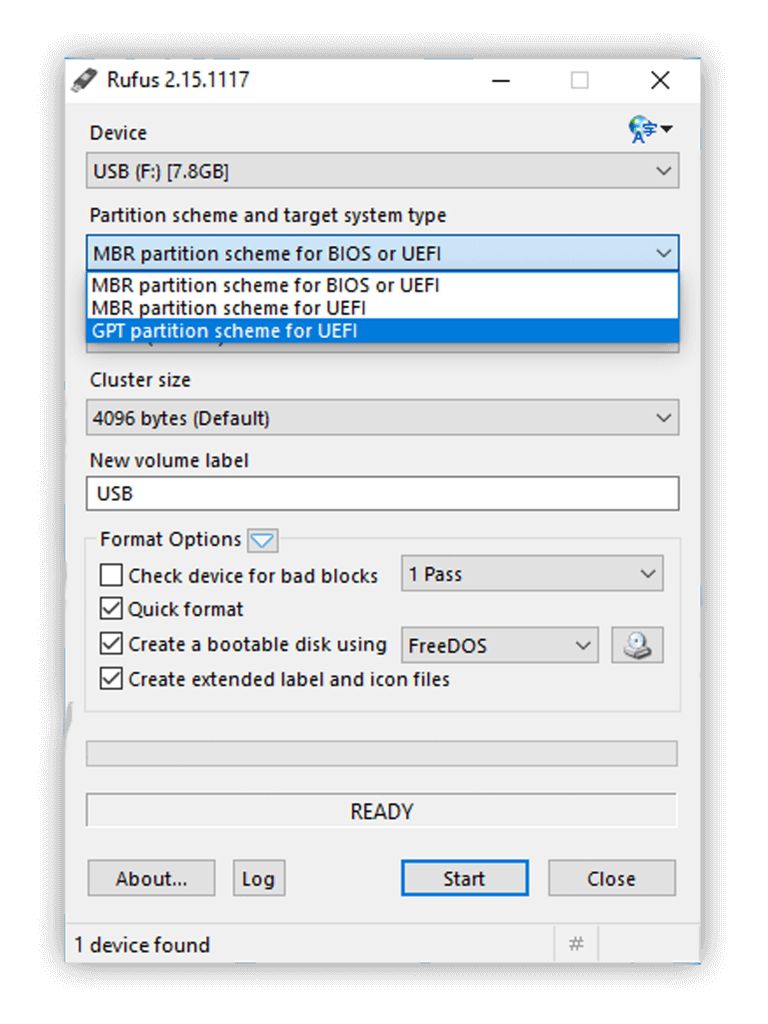
- Choose the BIOS mode to install. To install in UEFI mode with GPT partition scheme then select GPT partition Scheme for UEFI. If you don’t need UEFI, then choose the first option.
- Click on start button; it begins the process.
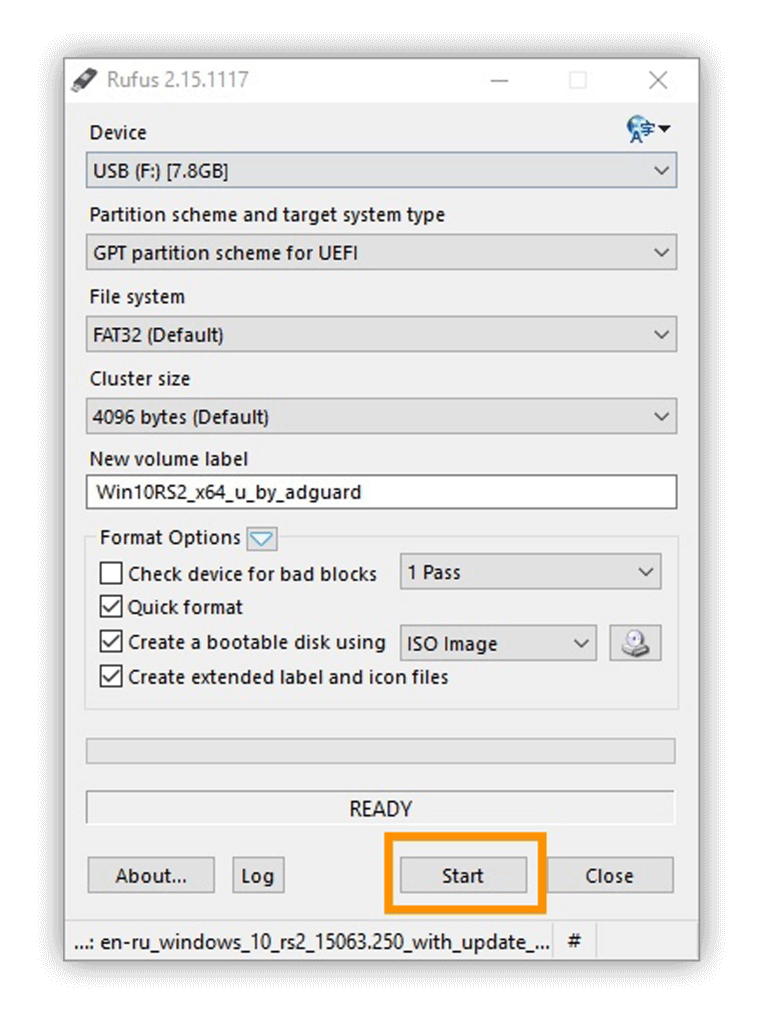
- After the progress bar reached at the end, You can remove your pen drive, and it is ready to Go.
Note – When using UEFI partition the whole HDD must be formatted in the targeted system so make sure to backup your HDD before installing Windows.
On Mac OS
You can install Windows on your Mac without creating anything, for that Mac has an application called Bootcamp. If you want to install windows on another system so here we have to use UNetbootin application. UNetbootin can make your pen drive bootable for any operating systems also it provides a download option for downloading open source operating systems such as Ubuntu, FreeDOS, etc. UNetbootin won’t support for making bootable USB for macOS. To install Mac OS on Intel-based PC’s we should use the Hacintosh version of Mac OS. Let’s begin the process.
- Connect USB to the computer
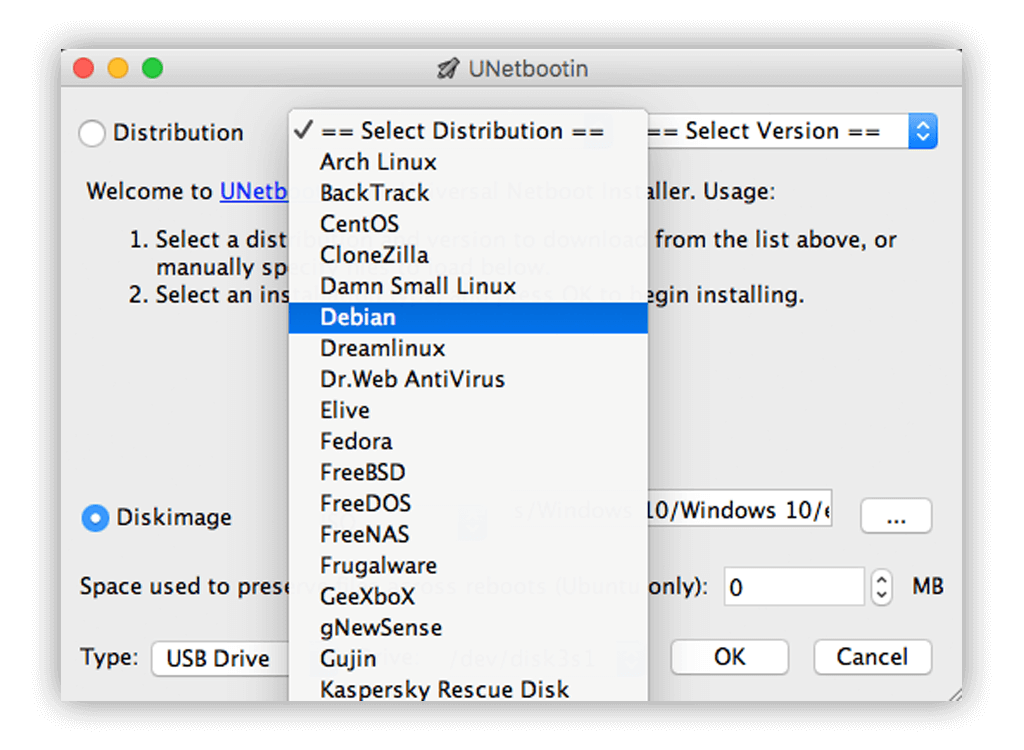
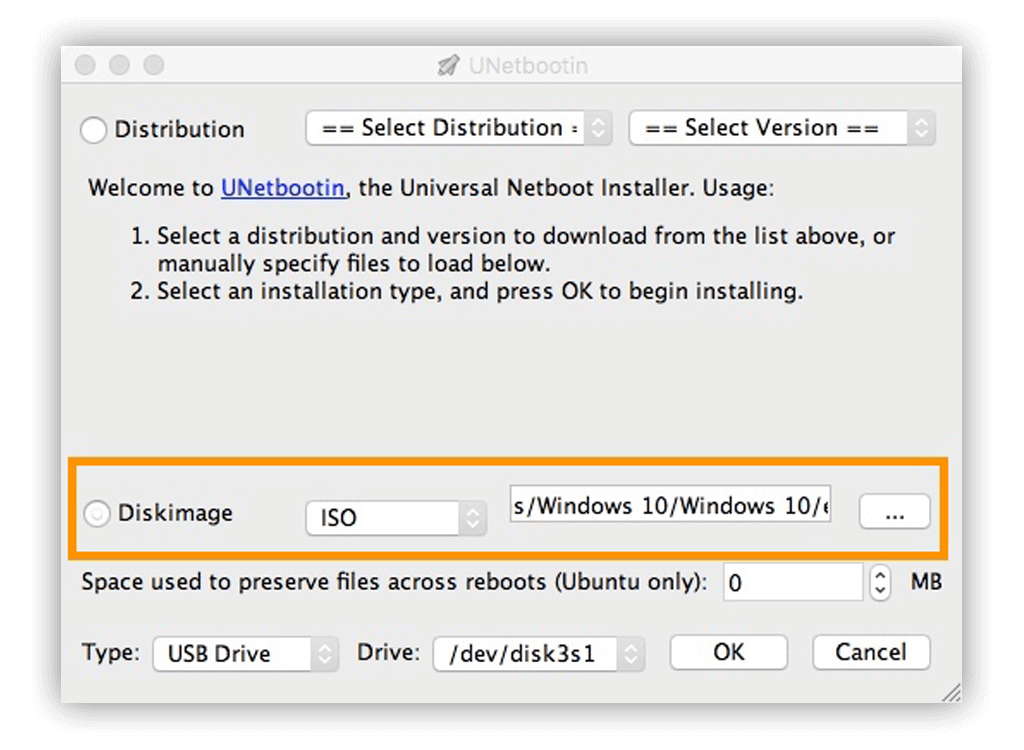
- Open UNetbootin and Select an operating system (You can download it or manually choose an OS image.)
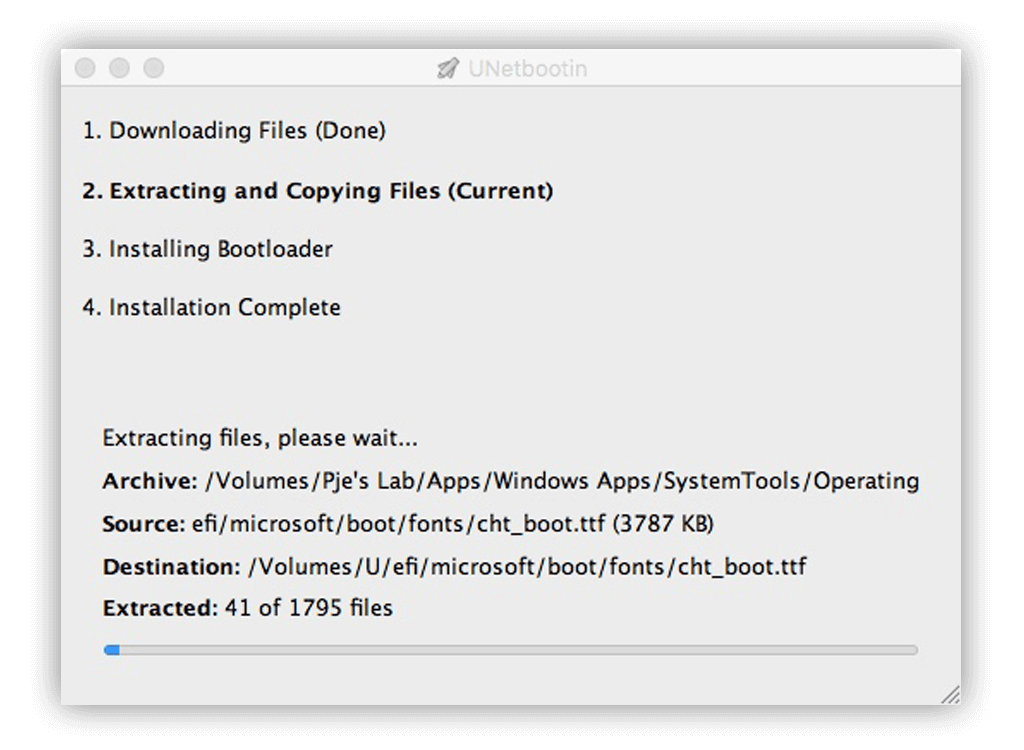
- If you are downloading, then it will take a while to complete.
- When the process is completed, you can remove the pen drive and install it on your system.
Note – In UNetbootin you can’t select boot option. It already has both UEFI GPT and BIOS MBR mode built into it, so you have to manually turn on UEFI in your BIOS settings to boot USB into UEFI mode
Conclusion
These are the best way to make bootable USB for media installation. There are more apps available for creating bootable USB drive, but the easiest and fastest way is to use these apps. If you have any suggestions or doubts mention me in the comment box below, Have a nice day.
