
Gadget lovers have been waiting so long for 25th September and they can’t just wait long enough to grab the new update of Apple for their Mac OS. It is named as High Sierra, it sounds like a small upgrade. If you look more closely, you will find it bigger because they had made huge changes under the hood that make them develop future Mac OS versions. In the last couple of months, I wrote an article to guide on how to install Mac OS Sierra on H270N Wifi. This article is to guide those who need to install Mac OS High Sierra on their Hackintosh. Let’s get started.
This installation is so easy because Tonymacx86 released the new version of Unibeast and Multibeast so it is easy to install Hackintosh on your PC. Still, you need some patience to install it as it is still in the development stage. Many people reported that they can’t install High Sierra on their systems. New APFS file system makes it difficult to install.
My Hackintosh Build
These are the configurations of my mackintosh build. It is an HTPC which doesn’t have any graphics card, I’m using the Intel HD Graphics.
Processor | Intel Core i5 7600 | |
Motherboard | GIGABYTE GA-H270N-WiFi | Amazon |
CPU Cooler | Noctua NH L9i | |
RAM | Corsair Vengeance LPX 8GB 2400MHz DDR4 | |
SSD | Samsung 850 Evo 256GB | |
Hard Disk | Seagate FireCuda Gaming 2TB | |
Power Supply | HDPlex 160W PicoPSU 160xt With 240W Dell AC Adapter | |
WiFi & Bluetooth | Apple’s Original BCM94360CS2 Card With M.2 NGFF Adapter |
What Works in this Hackintosh Build
All functions are working as expected on the new Mac OS High Sierra. These are the main things that a Hackintosher may reach for.
- USB 3.0
- SATA
- Audio
- WiFi And Bluetooth
- WiFi & BT working on Clover UEFI Installation
- Handoff, AirDrop, Universal Clipboard, Wake On Wireless, Auto Unlock, Unlock With Apple Watch
- Personal Hotspot with iPhone
- iMessage
- Built-in Ethernet
- TRIM support
- Intel HD630 integrated graphics
- Display Power Cycling
Untested
I can’t test these functions. One thing I can clarify that Sleep and Wake functions will not work with the integrated Graphics card. If you need sleep-wake function then you need to buy a discrete graphics card.
- Sleep Wake
- USB- C
BIOS Configurations
This is the most important step which you shouldn’t ignore. Read it carefully and make changes to your build.
Step 1= Load Optimised Default
- IN BIOS Tab
- Windows 8/10 Features = Other OS
- Storage Boot Option Control = UEFI
- Peripherals Tab
- Initial Display Output = Ignore it
- XHCI Handoff = Enabled (In USB Configuration)
- Chipset Tab
- VT-D = Disabled
- Internal Graphics = Enabled
- DVMT Pre-Allocated = 64M or Above
- Save and Exit
Files To Download
You need to download some files to get things work. These files are necessary for the entire session of the Mac OS installation.
- Clover Configurator
- Unibeast And Multibeast(Get the latest Versions)
- AppleALC.kext release
- Lilu.kext release
- Shiki.kext
- IntelGraphicsFixUP.Kext
- audio_cloverHDMI-120.command
- Latest Clover Bootloader
Installation
Installation Prerequisites
- A 200 Series Motherboard with Intel KabyLake Processor
- Working Mac or Hackintosh without this you can’t move forward.
- USB stick, 8GB or larger
Get Mac OS High Sierra
- Open Mac App Store
- Log in to your Apple ID
- Download macOS High Sierra (10.13)
- After the download finishes, the setup screen will appear, you should Quit the app from the Dock. You can see the application in/Applications/Install MacOS High Sierra.app
Clean Install – Mac OS High Sierra Hackintosh
This is the method to install Mac OS high Sierra on your computer using a USB stick. Follow these steps properly to get high Sierra installed successfully on your hack.
Create USB Installer
This step is very tricky, If you make any mistake in this step it may cause you more trouble. So follow the instructions carefully.
- Erase USB Stick and Rename it as USB. Open Disk Utilities –> Select USB and Erase using Mac OSX Extended Journaled –> GUID Partition Map–>Erase
- Copy your macOS High Sierra Setup on the Application folder of your mac.
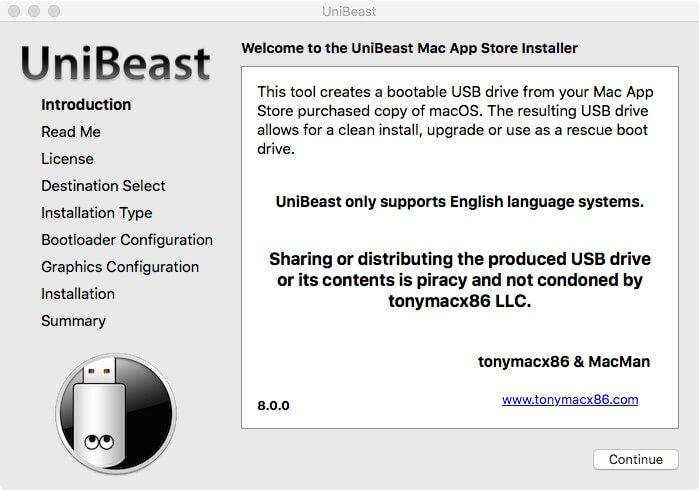
- Now open Unibeast and follow the steps
One: Click continue
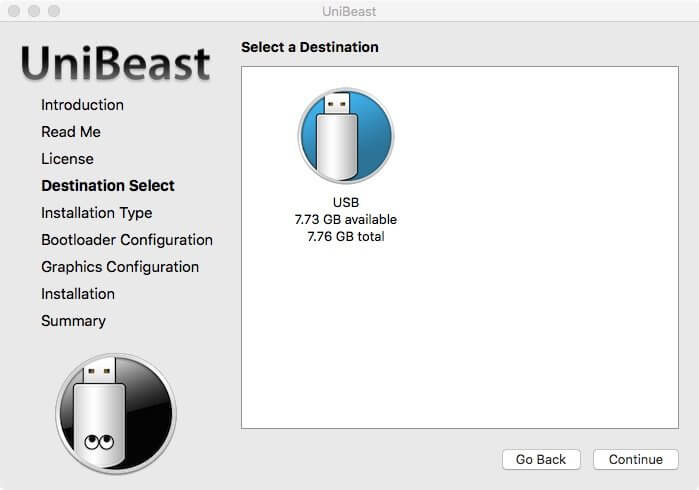
Two: Choose your formatted USB
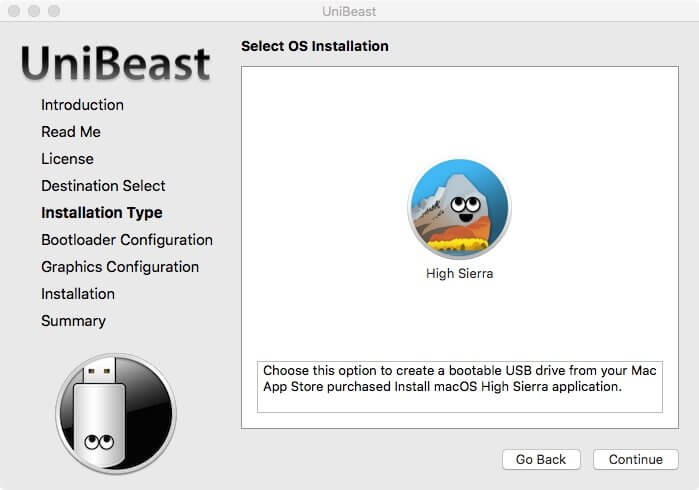
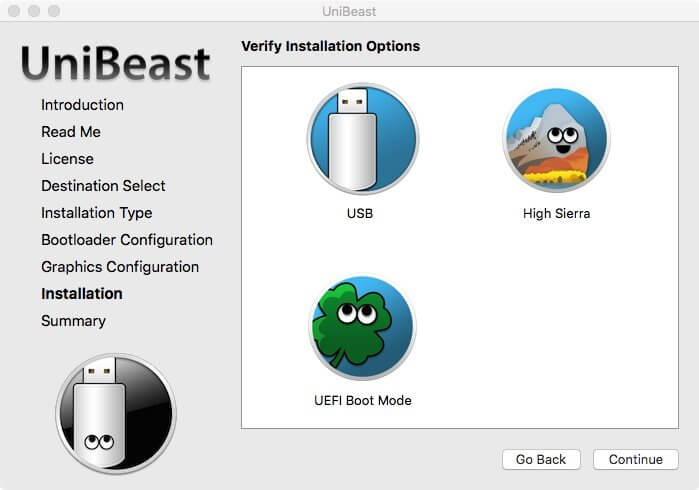
Three: Choose macOS High Sierra
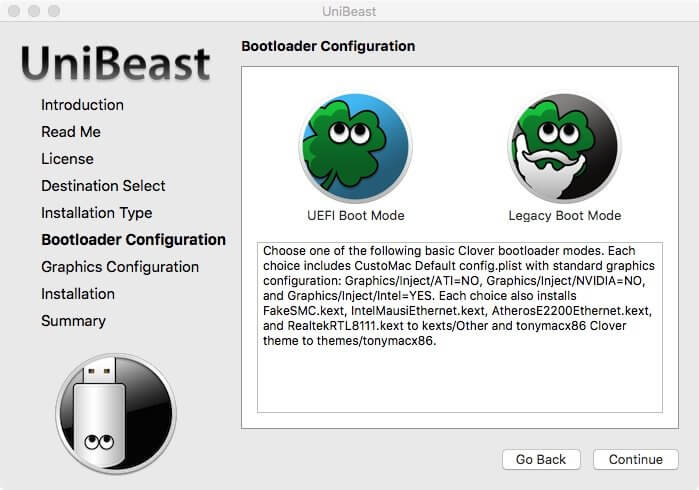
Four: Then select UEFI Boot Mode
Five: These are the selection that we made, click continue
Six: This step will take little longer to finish after the completion your USB is fully bootable.
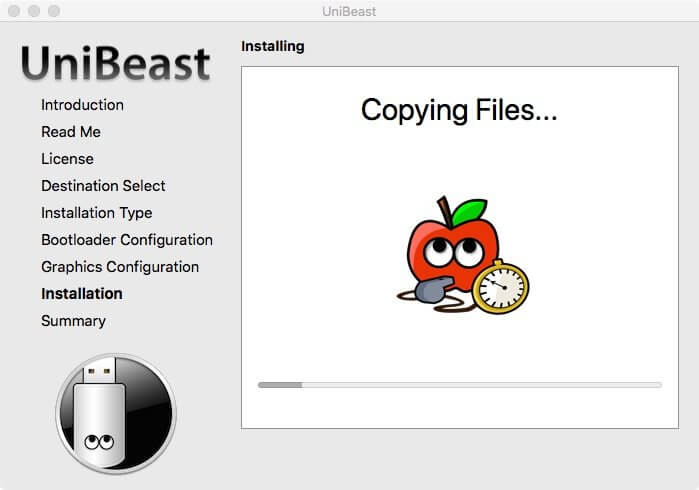
Now your USB Stick is fully bootable.
Install MacOS Sierra
- Turn on the computer
- Press the hotkey F12 or F10 to choose the boot device
- Select USB
- At Clover boot screen, select Boot macOS from Install MacOS High Sierra (The installer will restart several times (at least 3 times) so whenever it reboots repeat Step 2 to Step 4)
- When you arrive at the Installer, choose the language.
- from here select Disk Utility
- Highlight your target drive for the High Sierra installation in the left column.
- Click Erase button
- Name: type Sierra (You can rename it later)
- Format: choose APFS File System
- Click Erase
- Close Disk Utility
- Then select Install macOS High Sierra
- Highlight your target drive for the Sierra installation then click continue.
- After the first restart Press the hotkey F12 to choose your USB boot device
- From clover screen select HDD and it will start the installation. sometimes it suddenly reboots your computer just ignore that, when it reboots boot through the USB drive then select HDD again from the clover boot screen.
- After the final reboot boot through USB drive then select Boot macOS From HDD (HDD name will depend on in which name you choose when the HDD was erasing)
- Complete Your installation it will take some time to complete.
Post Installation
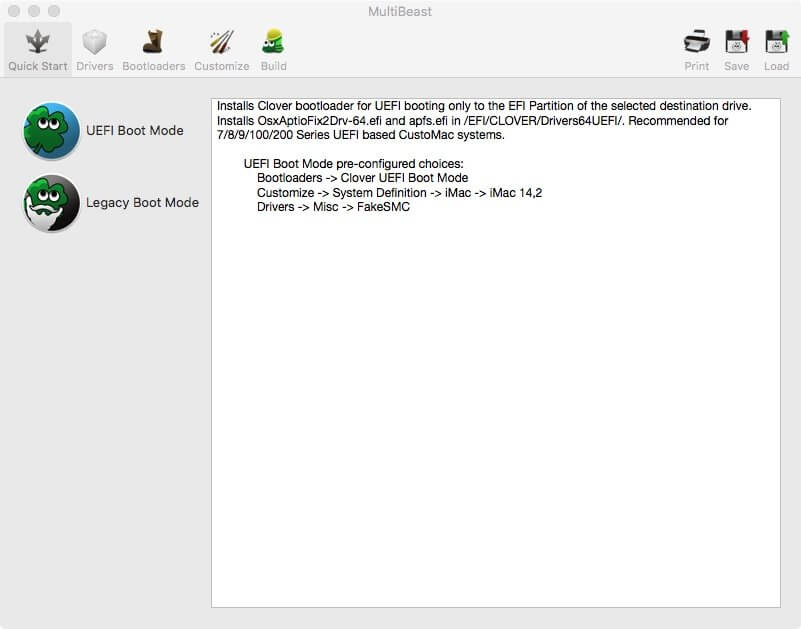
After the installation is over you have to install all the necessary apps and kexts. For that, we have the Multibeast that can install all the drivers that needed for Mac OS. Follow the steps in Multibeast to install kexts and apps properly.
First Step: Open Multibeast and then select Quickstart.
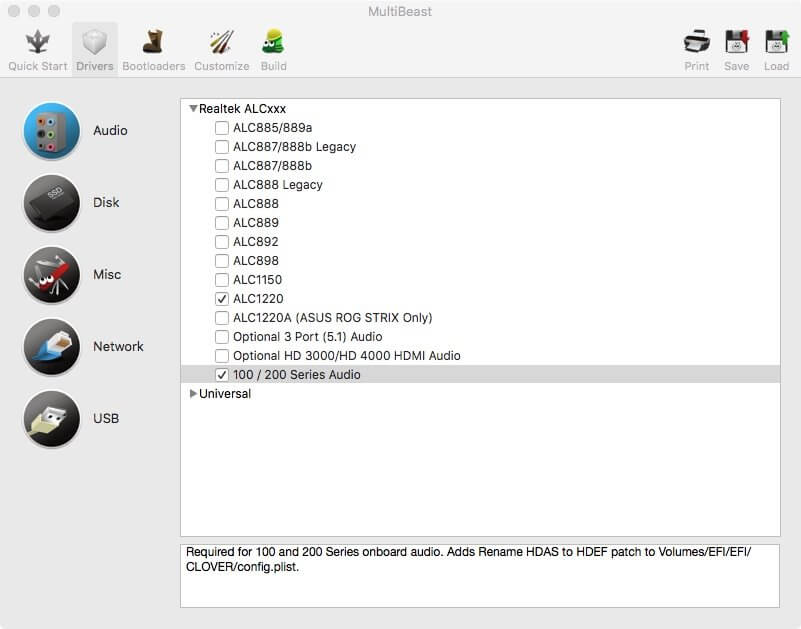
Step 2: [Audio] Select these two options or else choose the codec that suites your motherboard.
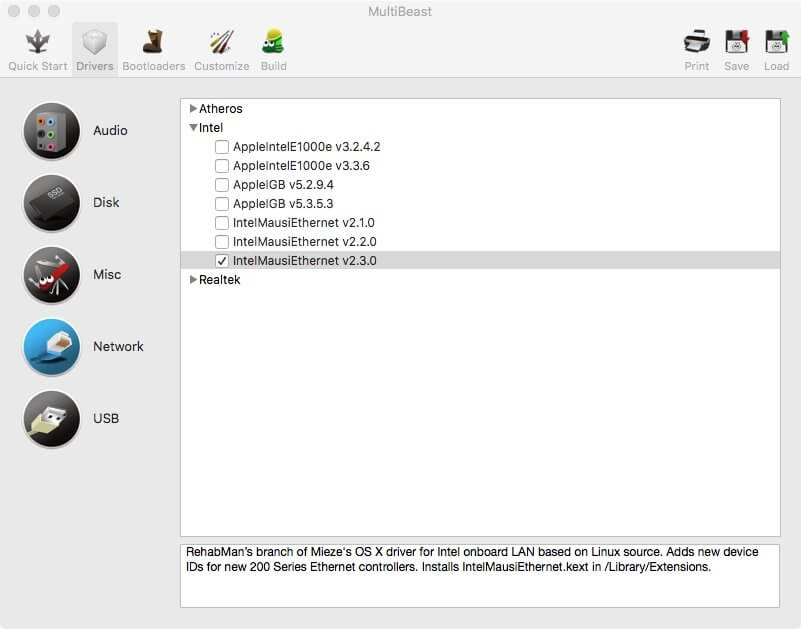
Step 3: [Network] Choose your network driver here.
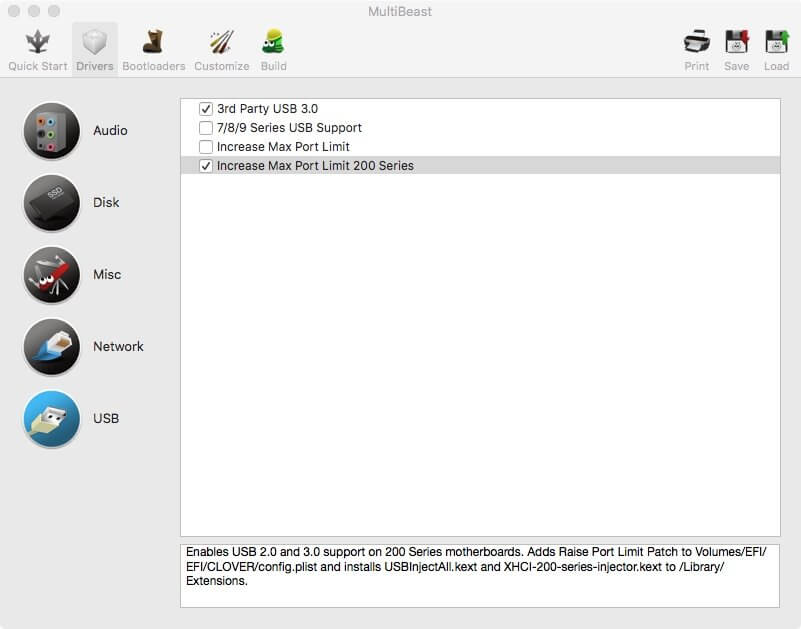
Step 4: [USB] Select these two option to get all ports of your computer get worked.
Step 5: [Bootloader] Select the third option to work some graphics accelerations and iMessage. For I message you have to do some more steps you can find those steps below of this post. keep reading.

Step 6: [Graphics] Select the proper graphics configuration below. if you select NVIDIA graphics then you have to install NVIDIA Web driver also you have to select NVIDIA Graphics fixup.

Step 7: [SMBIOS] From this step select the SMBIOS and click continue.

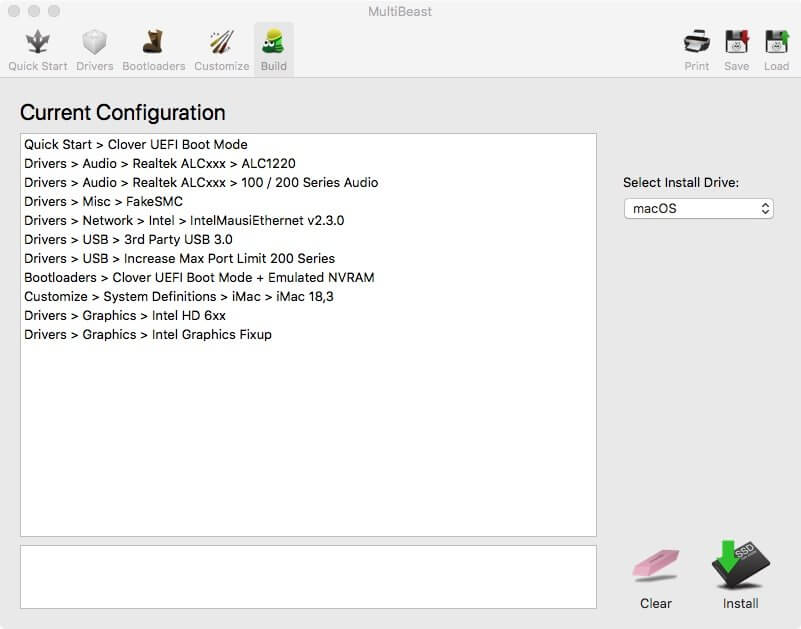
Final Step: Here is the final step that shows what we selected, confirm that you have selected all the drivers if you selected all the drivers then click Install.
After the installation is completed you can safely remove your USB drive and restart your computer and boot through the HDD now it will boot from your Hard disk. NVIDIA users need to add NVIDIA Web patch the same method that you used in Sierra. NVIDIA Web drivers for High Sierra is now available to download. note: install web driver before you restart your computer after the Multibeast post-installation, otherwise your system will not boot properly.
Direct Upgrade to Mac OS High Sierra
If you don’t need to fresh install the OS then you can try this method. Before you start I recommend you to make a backup using Carbon copy. Follow the below instructions to update your current operating system to Mac OS High Sierra.
- Download Mac OS High Sierra from the App Store
- Update your Clover Boot-loader to the latest version
- Update all your patches and kexts then restart your computer
- Open Install Mac OS High Sierra from the Application folder and follow the instruction.
- While upgrading your system will restart several times so keep calm. It will take you to the Desktop after sometimes.
- After the installation, it will show you the final configuration complete it then you are good to go.
Conclusion
Now you have the successfully working High Sierra. Also, you have the USB stick that fully bootable so keep it safe so you can easily reinstall macOS if anything happens in the future. I will update this article whenever a new update or patch becomes available. Until then keep reading this. Have a great day.
